B15. How Can I Change an Invoice's Payment Term?

This entry will show you where you can set up payment terms for your invoices.

In General

You can select a payment term and a bank account when you create a case. These settings will be used for every invoice in this case.

Both indications should be printed on the invoice. Simply use the expression bellow and the payment conditions will be added to your invoice:


INV_INSERT ("payment_conditions")

Here is where this information comes from and how you can modify it.

Bank Account

You will first have to enter each account individually. Go to "Special", "Accounting", then select "Chart of Accounts". Click on the account you want to modify.

Under "Ledger", enter the information you wish to print in the field "Account Information for Invoices". If you print invoices in different languages, you will have to re-enter the information for every language. Use the translation icon on the right.


Payment Term

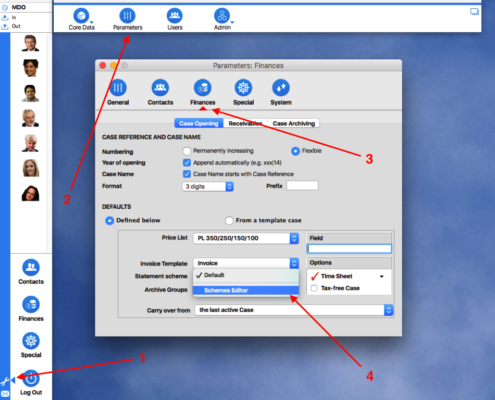
Then, enter the payment term as it should be printed on the invoice for every statement scheme. There are several ways to access the statement scheme editor.

For example, go to "Settings", "Parameters", then open the statement scheme editor from the "Finances" tab.

On the left, select a statement scheme.

Enter the text you wish to print on your invoices and credit notes in the field "Payment terms for invoices and credit notes". The expressions (due), (term) and (account) will automatically be replaced by the corresponding information.

If you print invoices in different languages, you will need to manually enter each text for each language. The translation icon to the right will help you do that.


If set up correctly, the expression INV_INSERT ("payment_conditions") will automatically add the right payment conditions to your invoice, depending on your statement scheme, account and language.

B16. How Can I Customize the Time Sheet?

You can customize the time sheet for the entire firm. Go to "Special", "Timekeeping", then select "Settings". You can choose:

  • which years should appear on the time sheet
  • a cut-off month prior to which no services can be added
  • what totals should look like on the time sheet

B17. How Can I Monitor Working Hours/Holidays and Create Work Schedules?

This entry will show you how to monitor the working hours and holidays of your employees.


Step 1: Create an Internal Case

You need to create internal cases so that your employees can enter work hours and leaves. Go to "Contacts". If your firm does not show up under "Employees", add it now.

In the dossier of your firm, add cases for:

  • Vacation
  • Sick leave
  • Military service
  • Continued education

Make sure to select the position "Internal" under "Status".

If you want to define a number of hours for a specific case, e.g. a number of vacation days, click on the checkbox "Metered case".


Step 2: Add Work Schedules

To monitor work hours and vacation, you need to create an individual work schedule for each employee. Open the employee's settings in the user editor and assign a work schedule. If you need to create a work schedule, open the scheme editor.

In the scheme editor, there are several tools that you can use to calculate your employee's work hours. You will need to define the planned work hours for each month.

First, enter your employee's workload. Select the line "Workload", then choose "Calculate Workload from calendar...". This will only work if you have previously entered a valid calendar for your firm, including local holidays.


Using the assistant, enter your employee's daily workload. Based on your settings and your calendar, timeSensor LEGAL will calculate the employee's workload. These are the number of hours that your employee should do every month.

If your employee has joined during the year, make sure that this is reflected in the editor. The workload should begin when your employee has joined and previous lines should be empty.

Then, enter the monthly hourly budget for each metered case. If your employee works 42 hours a week and has five weeks of vacation, you should distribute the total vacation time of 210 hours over the year. Each month will have a budget of 17.5 hours vacation. You can facilitate this process by using the feature "Spread hours evenly".

Once this is done, you can start monitoring work hours.


Time Tracking

Instruct your employees to keep track of all time, including sick leaves, vacation, and such, by using internal cases. Your staff will just have to select the corresponding case in the time sheet. Please note that all entries must be made in hours. One week vacation should be entered as 42 hours in the case "Vacation".


Monitor Work Hours

To monitor work hours and vacation, go to "Special", "Timekeeping", then select "Time and Holiday Balance". This feature will calculate work hours and vacation by comparing work schedules with hours entered in the time sheet. At the top right of the window, you will see the total number of vacation and the total number of absences. In case of an overdraw, the number will be red. If your employee has worked overtime, the total absences will be green.


B18. How Can I Set Up Standard Deadlines?

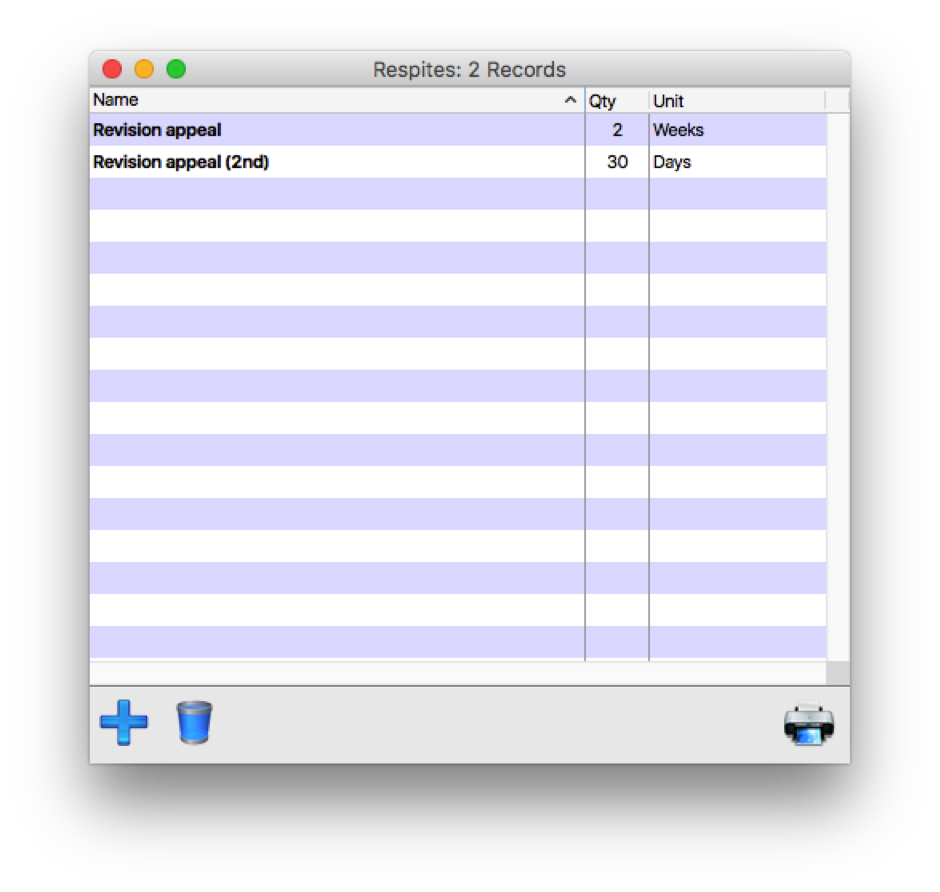
Standard deadlines will show up as options in the action menu every time you add a new deadline. They make adding pre-defined deadlines easier.

Set Up Standard Deadlines

Go to "Settings", "Core Data", then select "Standard Deadlines". You will find some predefined deadlines on the list. You can add standard deadlines using the plus button or delete them by clicking the bin.


Use the editor to set up the new standard deadline:

  • Choose a name in the field "Title".
  • Under "Add", select the number of days, weeks of months to add.
  • Under "Start", choose if the deadline should start on the day of the event or on the day after the event.
  • You can exclude Saturdays, Sundays and Holidays as end dates.
  • You can set up a reminder with a ticket.
  • Under options, indicate if this is a legal respite.


Use Standard Deadlines

All standard deadlines are available in the deadline calculation tool:


B19. How Can I Export Deadlines and/or Appointments?

The background task "Deadlines" will export all entries in "Deadlines" or "Calendar" in iCal format. One file will be created for each employee, either under a local path, on a ftp or a webDAV server. If you want to subscribe to those deadlines with an iPhone or use them with an iCal compatible calendar, it is recommended to export to webDAC Share. To do so, follow these steps:

Export Deadlines

Please note that deadlines will only be exported if the employee has activated iCal export in his deadlines or his calendar (menu "Tools").


Activate Export

Go to your personal space, then click on the "Deadlines" button or the "Calendar" button. In the menu "Tools", select "iCal export".

In the iCal Export window, check "Turn on iCal Export". You can choose to export deadlines as events or as to-do's.

  • Export as event will create an entry in the main window of your iCal calendar and is recommended for your calendar.
  • Export as to do will create a task. This is recommended for deadlines.


Please note that every user has to set up the Calendar export individually. The above mentioned process will only work for the user who is currently logged in.

Activate the Background Task

To export deadlines regularly, you need to activate a background task. Go to "Settings", "Admin", then select "Background tasks". In the editor, click on "Deadlines" to set up the background task.

Set Up the Background Task

In a system with one workstation, the background task will run on the local workstation when timeSensor LEGAL starts. In a system with several workstations, the background task can be set up on the server or on the local workstation. It is advisable to set up the task on the server. To begin, choose if you want to set up the task on the server or on the workstation. Then, turn on the task and define the timeframe for timeSensor LEGAL to run the export. You can set the task to begin at 01:00 and end at 23:55. This will leave about an hour every night for backups and updates without other tasks running in the background. You can choose how often you want repeat the task in the interval. The interval should be set between 3 and 5 minutes. In the following example, we have chosen the minimal interval of 1 minute.


Set up a dedicated share on your server for the export. Activate the WebDav protocol in the settings of the share, even if no webDAV export is run.


Next, set up a local export on your server. You will have to install the timeSensor client on the server.

  • Open the task manager and click on "Deadlines"
  • Set up a local export
  • On your server, select the share that you have just created. You will find it in the shared folder on the server's hard drive.

Please note that timeSensor will only perform an export if at least one user has activated iCal export, as mentioned above.

Once all this is set up, timeSensor will export to the share one .ics file for each user who has activated the task.


 Open your Calendar. Under "File", choose "New Calendar Subscription..."


Please make sure to enter the Calendar URL exactly as follows:

http://"inter IP address of the server"/webdav/"name of the share"/"name of the .ics file"

The expression "webdav" in the URL is mandatory, the other expressions will depend on your settings. To look up the name of the .ics file, just open the share and copy the name. Usually, the name should look like this:

Deadlines_"Initials".ics

For example:

  • Deadlines_MMU.ics
  • Deadlines_SAM.ics


Once this is done, Calendar will import the file. You may customize some settings in the next window.
Please remember that one calendar will be generated for each user. If you want to see the deadlines of all employees, you need to import all their calendars. Each calendar is an individual .ics file.


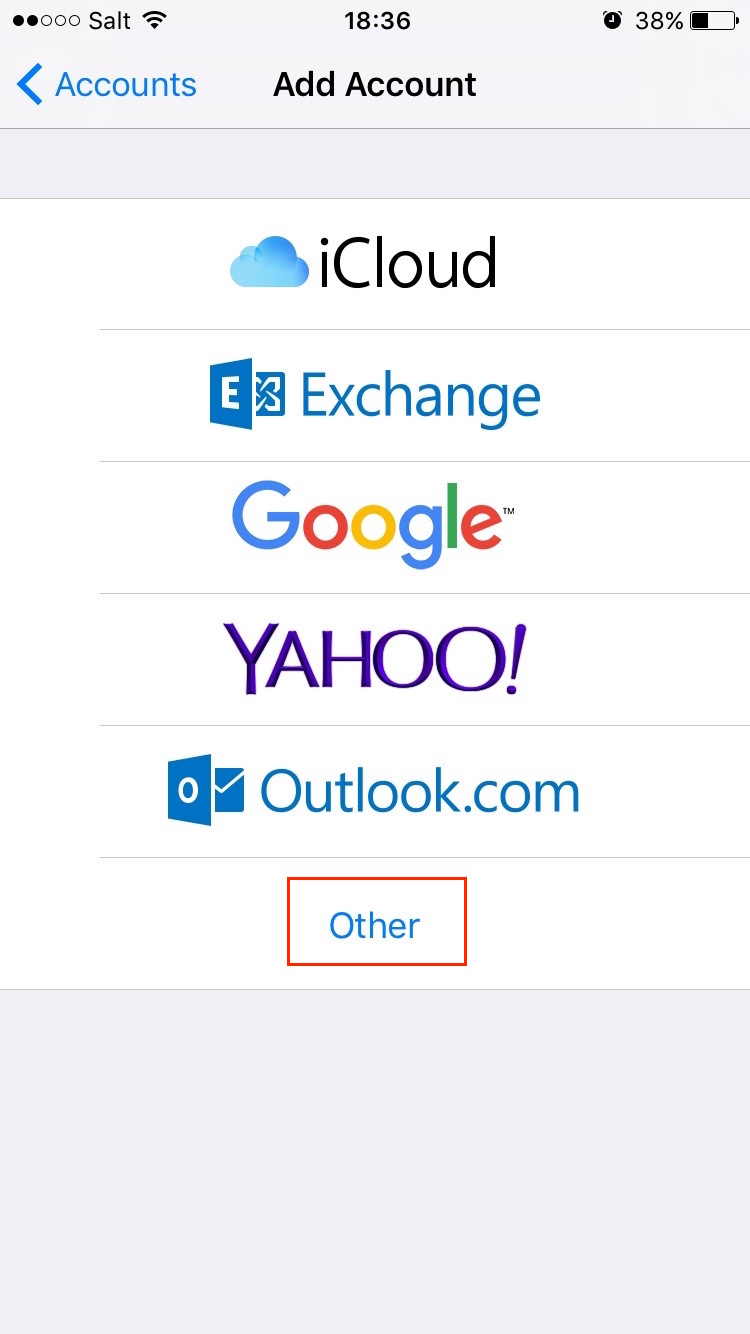
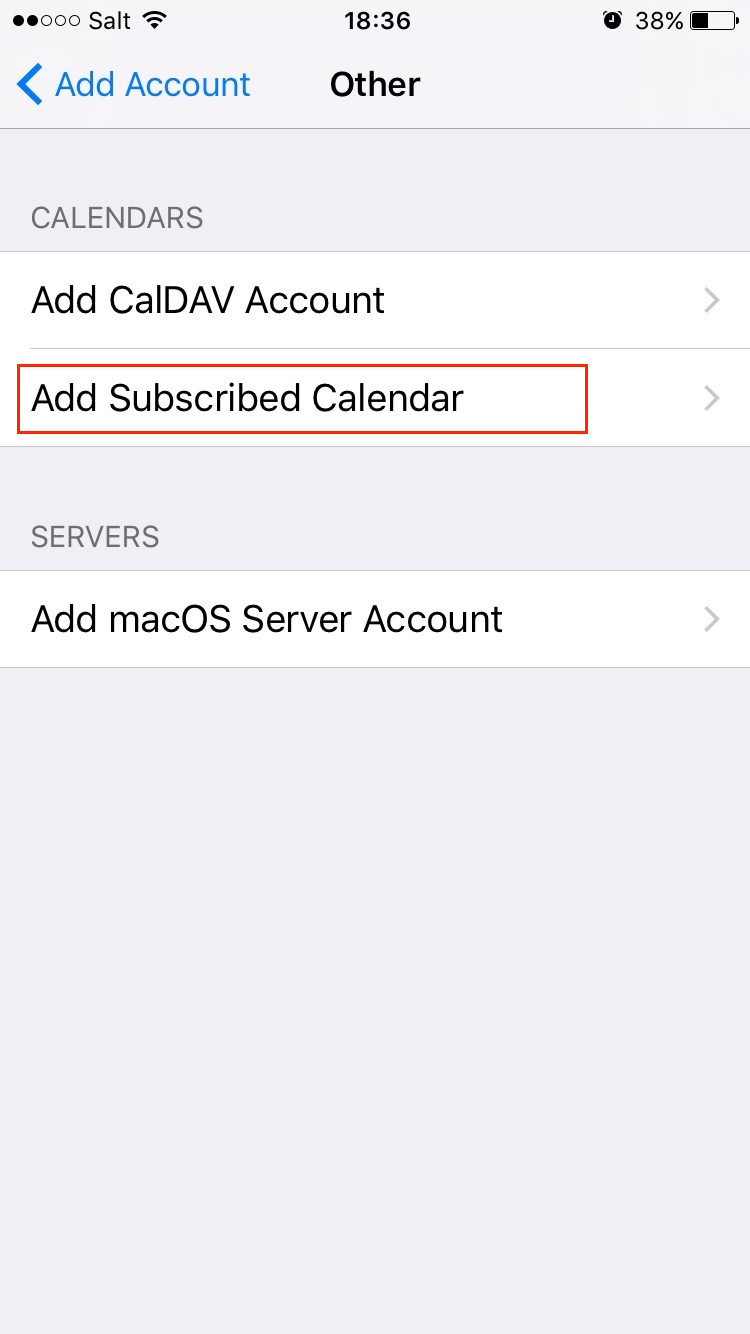
Settings on iPhone or iPad

Enter the username and password for the webDAV share. Select "Save" to subscribe. Your iPhone or iPad will regularly download the deadlines and show them in your calendar.


Settings for Outlook

You can subscribe to an iCal with Outlook. For more information click here:

http://windows.microsoft.com/en-us/windows/outlook/calendar-import-vs-subscribe

B20. How Can I Add Tags?

Tags will help you save and organize additional information in the master sheet. This information will be searchable. Unlike normal fields, tags are separate entries which are attached to the master sheet. Use tags to:

  • enter partners, children or pets of your clients in your CRM,
  • register vehicles, weapons or other resources of your clients
  • enter hobbies or particular interests

Define Tags

You need to define tags before you use them. Go to "Settings", "Core Data", then choose "Tags".


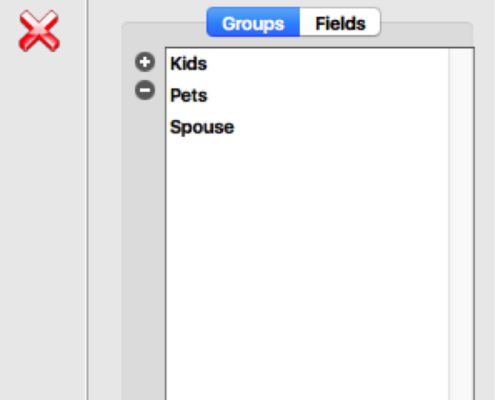
You can add a tag with the plus button. In the following example, we will create the tag "Family" and add three groups: "Pets", "Children" and "Partner". You can add each group with a click on the grey plus button.

In the tab "Fields", you can customize the fields of your tag. To add a field, click on the action menu and select "Create field".

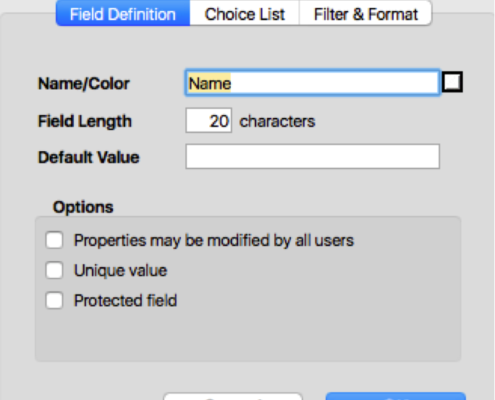
Proceed and define the new field:

  • Under "Name", enter the name of the new field
  • Under "Field length", define the allowed number of characters
  • Under "Default value", you can enter a default entry that will be filled in every time the tag is added. The default entry may be replaced by the desired value.
  • Under "Options", you can decide whether this field may be modified by all users or only by an administrator.
  • Under "Choice List", you can create a list of default values. Separate entries with a paragraph break. You can choose to allow only these values or let each user define the value. You can also decide to allow all users to modify the list.
  • If the custom field is a date field, the last tab will be "Formatting":
    • The minimal value is the lowest value that can be entered
    • The maximum value is the highest value that users can enter
    • Under "Formatting", you can select how the date should be displayed
  • If you have created an "Integers" or a "Reals" field, the last tab will also be "Formatting":
    • The minimal value is the lowest value that can be entered
    • The maximum value is the highest value that users can enter
    • Under "Format", you can define the format of the integers number
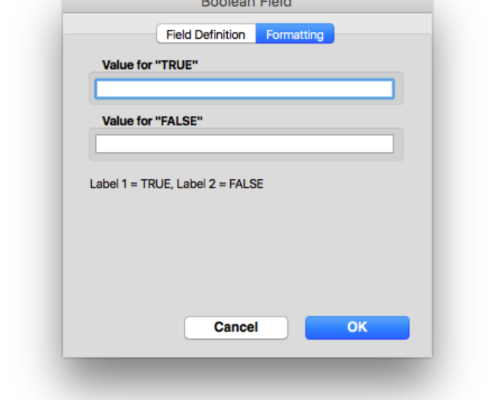
  • If you have created a boolean field, you will only have two tabs. The first tab is "Field Definition" and the second "Formatting". The second tab lets you enter the values for true or false. If you only define one value, the field will be displayed as a checkbox. If you define both values, users will have to select either one in a bullet-point list.

Add Tags to the Dossier

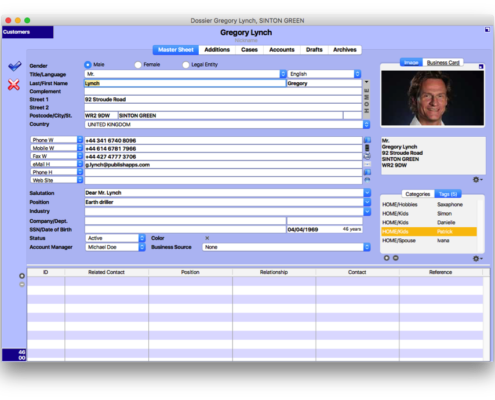
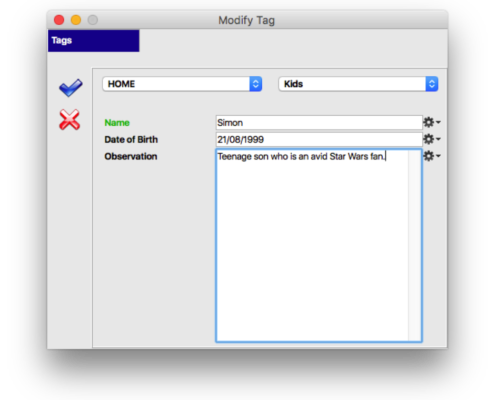
You can add as many tags as you want on the first page of the dossier. Just go to the "Tags" tab and click the plus button to add a new tag. You can delete tags with the minus button. In the following example, we have added tags for the partner, the children and some particular interest of a client.


Search Entries for Tags

You can search for tags in the address list, using the search icon. In the search window, you can for example search for all clients whose partners have a birthday in July.

B21. How Can I Set Up timeSensor LEGAL In Order to Receive All Important System Messages?

From time to time, timeSensor LEGAL may need to send important messages regarding the system, security or communication. The software will send a ticket to all pre-defined users. Examples:

  • The daily backup of the 4D server failed. This system error will be reported in a ticket.
  • A user has entered a wrong password three times in a row. This important security issue will be reported in a ticket.
  • The attachment in an email is too big and that email cannot be archived. This will be reported in a ticket.


If you want to be notified by timeSensor LEGAL every time something like that happens, you can set this up in your user account. Go to "Settings", "Users", the open your account settings. Under "Options", you will need to set your expertise to "Power User".

Then, select the notifications you wish to receive. You will then receive all tickets relevant to the area you have subscribed to.

Make sure that the person in charge at your office receives every relevant notification. This way, you will be alerted of all potential problems and can act accordingly.


B13. How Can I Manage Numbering For Case Archiving?

timeSensor LEGAL can suggest archiving numbers for your files. You can tailor those numbers exactly to your need. You will need administrator rights to make the following changes.

Go to "Settings", "Parameters", "Finances", and click on the tab "Case Archiving". You will find the following options:


Number Ranges: If you have offices or archives in different locations, you can set up a number range for each of those locations. Each number range will have a number (to be selected in the menu), a prefix (which will be put in front of the number), and the actual number. You can choose any increment for the numbering.

Numbering:  Choose "Permanently increasing" if you want your archiving numbers to increase continuously, even after the end of the year. Choose "Flexible" if you want to start at one on January 1st. Finally, select a format the fits your needs. If you archive fewer than 1000 cases a year, 3 digits are enough.

Year of Archiving: You can choose to add the year of archiving at the end of the archiving number. You can add the year as two or four digits. Any character can act as a separator.

Closing text: Using a formula, you can add any additional text or characters at the end of your archiving number, such as the archiving date or initials of the archiving employee.

Hint: These parameters may vary according to your edition of timeSensor LEGAL. 

B22. How Can I Trace the Source of an Error?

In order to trace the source of an error, either user-related or program errors, it is necessary to reproduce the error. As long as we cannot reproduce an error, we cannot fix it.

Once an error has occurred, it will often be difficult to reconstruct the process that lead to it. For this reason, while looking for an error, it may be helpful to run a screen recording in the background. Your screen will be recorded while you are working. Should an error occur, it will be possible to rely on the screen recording in order to reproduce and eliminate the error.

Under Mac OS X, the software "QuickTime", which ships with the operating systems, includes screen recording features. Follow these steps:

  1. Start "QuickTime Player". You will find it in your applications folder.
  2. In the "File" menu, select "New screen recording".
  3. In the small window "Screen recording", press the red "Record" button (the button with a red dot).
  4. To start recording, click once in the middle of the screen. QuickTime will now record all movements on your screen.
  5. Once the error occurs, click on the stop icon in the menu at the top of your screen. The recording will stop and will show up in the window that pops up.
  6. Save your recording on the desktop (this will create a ".mov" file).
  7. If you finish your work process without an error occurring, just stop the recording and discard it.


Similar tools are available for Windows, such as e.g.: http://www.apowersoft.de

B23. How Can I Update Macros in Word Templates?

Thanks to a macro specifically designed for this purpose, Microsoft Word can fetch data from timeSensor LEGAL and insert it in templates. New developments in Word may require an update in the macro. For example, since Build 1554, it is possible to save new Word documents directly in the case folder of timeSensor LEGAL. To use this feature, it is necessary to update the macro in the Word documents.

This is how to proceed to update your Word templates:

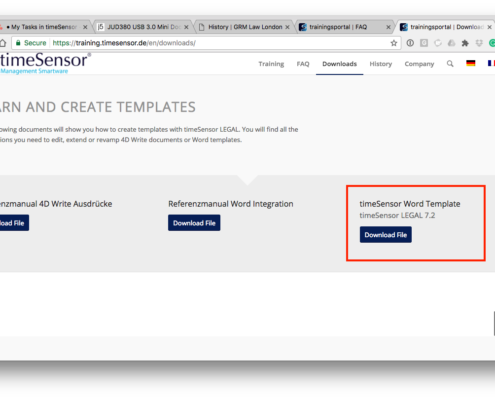
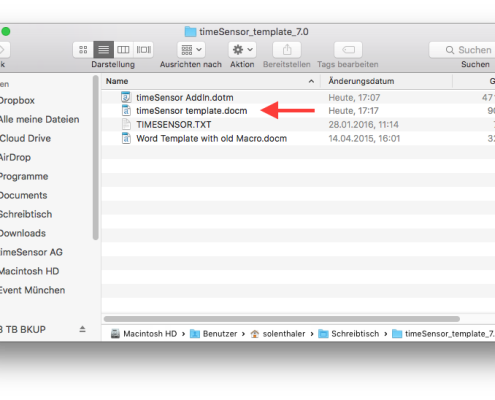
  • Download the newest version of timeSensor LEGAL's Word template from the timeSensor LEGAL Training portal. Keep the folder at hand by saving it on your desktop.
  • Open the template editor in timeSensor LEGAL. You will need administrator rights.
  • Go through the following steps for each document you wish to update:
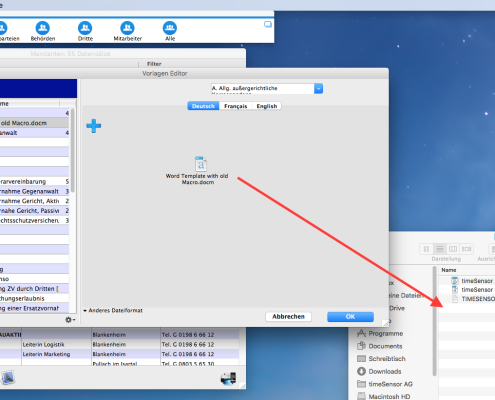
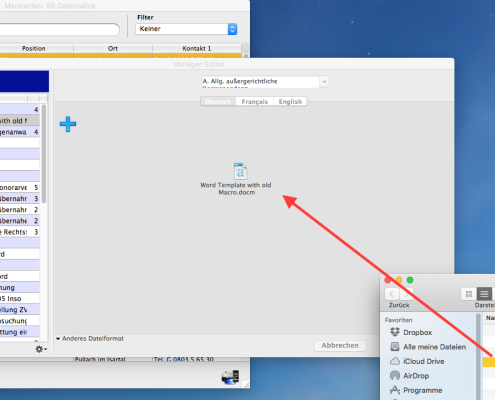
    • Drag & drop the document from the template editor into the timeSensor template folder
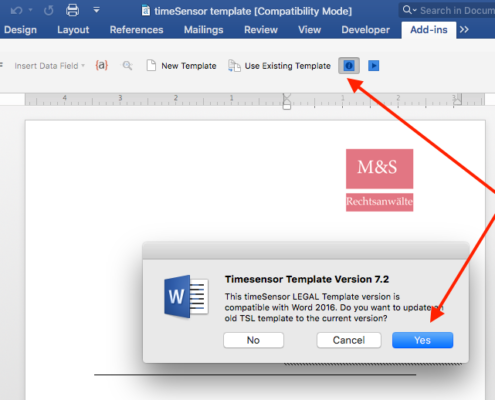
    • Click and hold the shift key while you open the document "timeSensor template.docm" with a double-click (provided it is not open already)
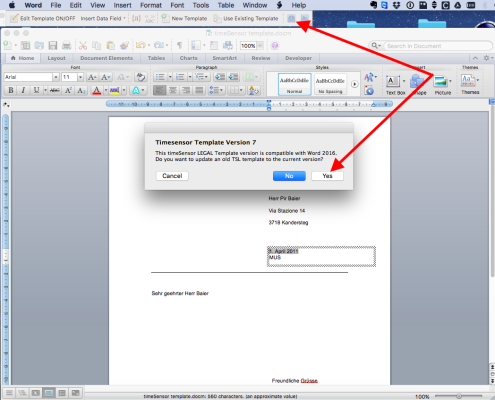
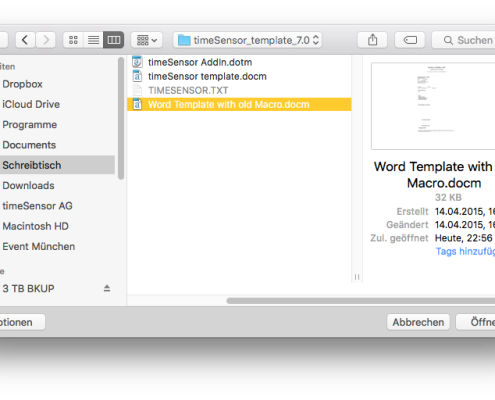
    • Look for the "info button" (depending on your Word version, you will find it in the tab "add-ins", in a separate ribbon, etc.). Click on this button.
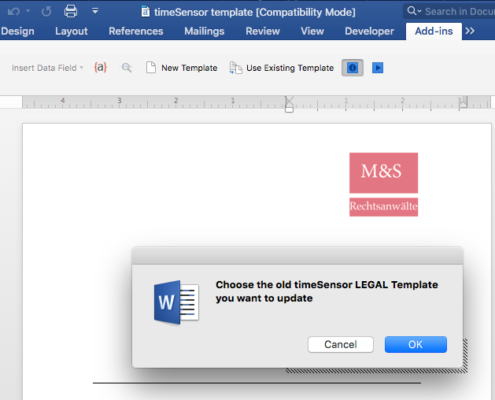
    • Word will ask you to select the document you wish to update.
    • The macro will be updated and Word will confirm this with a message.
    • Finally, drag & drop the updated template back from the folder into the template editor. This old template will be replaced.